Appearance
深入浅出Quill:Quill基本使用和配置
引言
Quill 是一款 API 驱动、支持格式和模块定制的开源 Web 富文本编辑器,目前在 GitHub 的 Star 数是 38k。
深入浅出 Quill 系列打算按照使用 -> 原理 -> 实践的思路去讲 Quill 富文本编辑器,主要分成以下7篇。
- 深入浅出 Quill 系列之使用篇1:Quill 基本使用和配置
- 深入浅出 Quill 系列之使用篇2:通过 Quill API 实现对编辑器内容的完全控制
- 深入浅出 Quill 系列之原理篇1:现代富文本编辑器 Quill 的模块化机制
- 深入浅出 Quill 系列之原理篇2:现代富文本编辑器 Quill 的内容渲染机制
- 深入浅出 Quill 系列之实践篇1:如何将龙插入到编辑器中?
- 深入浅出 Quill 系列之实践篇2:整个贪吃蛇游戏到编辑器里玩儿吧
- 深入浅出 Quill 系列之选型篇:Quill 富文本编辑器的实践
本文是第1篇,我们先从 Quill 的基本使用开始吧!
1 极简方式使用 Quill
快速开始三部曲:
- 安装
- 引入
- 使用
shell
// 安装
npm i quill
html
<div id="editor"></div>ts
// 引入
import Quill from 'quill';

// 使用
const quill = new Quill('#editor');
虽然我们已经初始化了 Quill 实例,但是在页面中却什么也看不到。
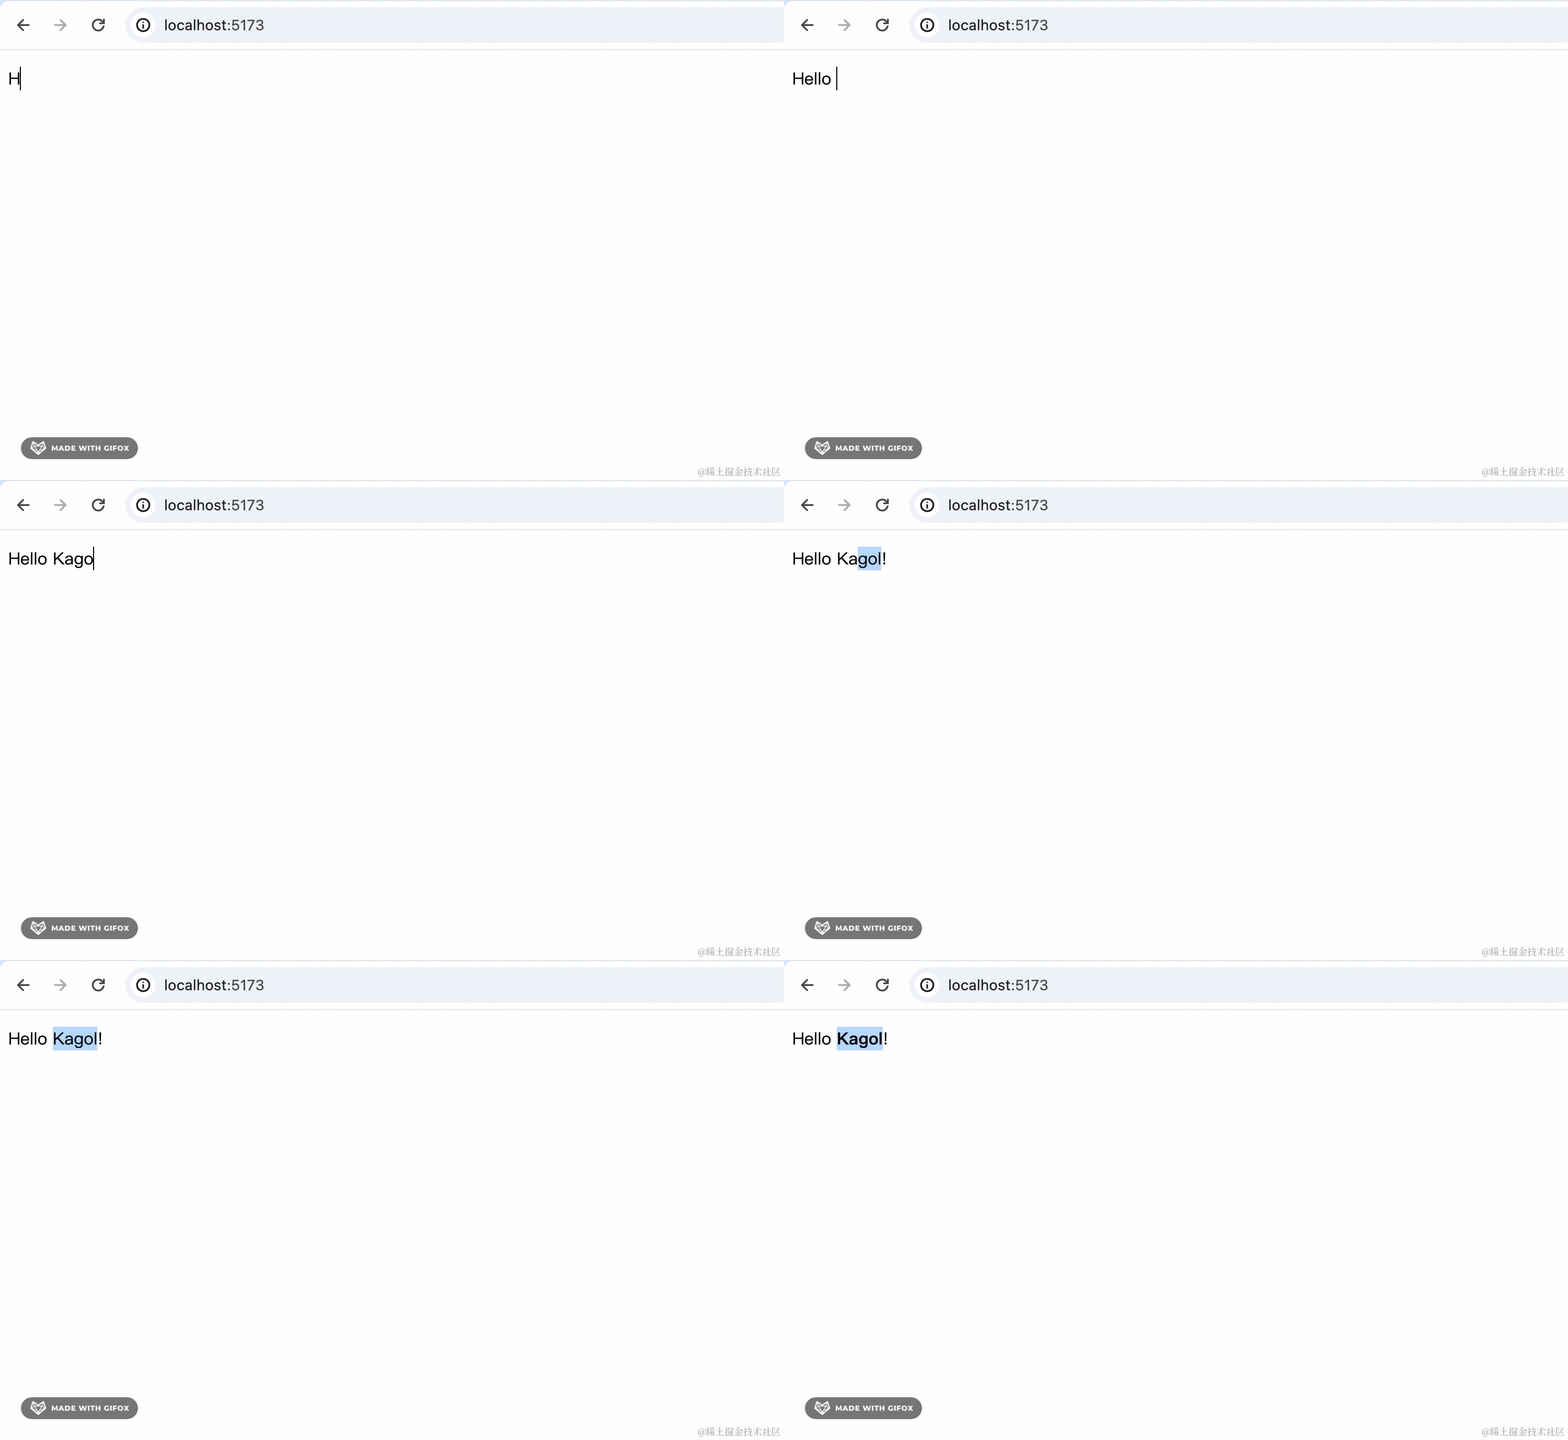
虽然看上去什么也没有,但是我们点击空白处,会发现有一个光标,并且可以输入内容,并给内容增加格式(由于没有工具栏,只能通过 Quill 快捷键Ctrl+B增加格式),以下是动画效果:
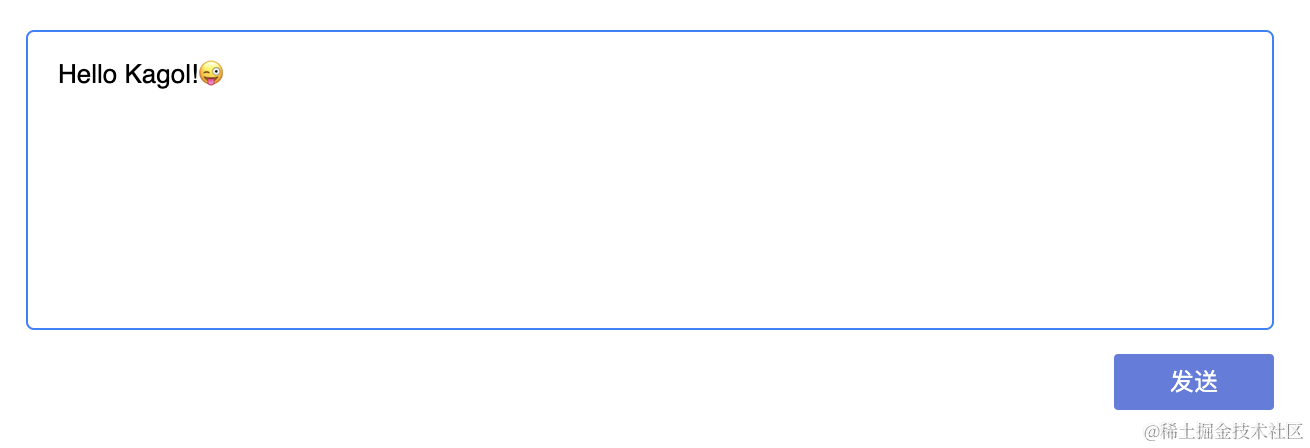
虽然只是一个极简版的富文本编辑器,不过加上边框和按钮,就是一个基础版的掘金评论框(还差插入表情和图片)😜
这是使用 Quill 最简单的方式。
2 加一些配置选项吧
2.1 配置编辑器容器元素 container
Quill 类一共有两个参数,第一个参数是必选的编辑器容器元素container,可以是一个CSS选择器,比如前面的#editor,也可以是一个DOM元素,比如:
ts
const container = document.getElementById('editor');
// const container = document.querySelector('#editor');
// const container = $('#editor').get(0);
const quill = new Quill(container);
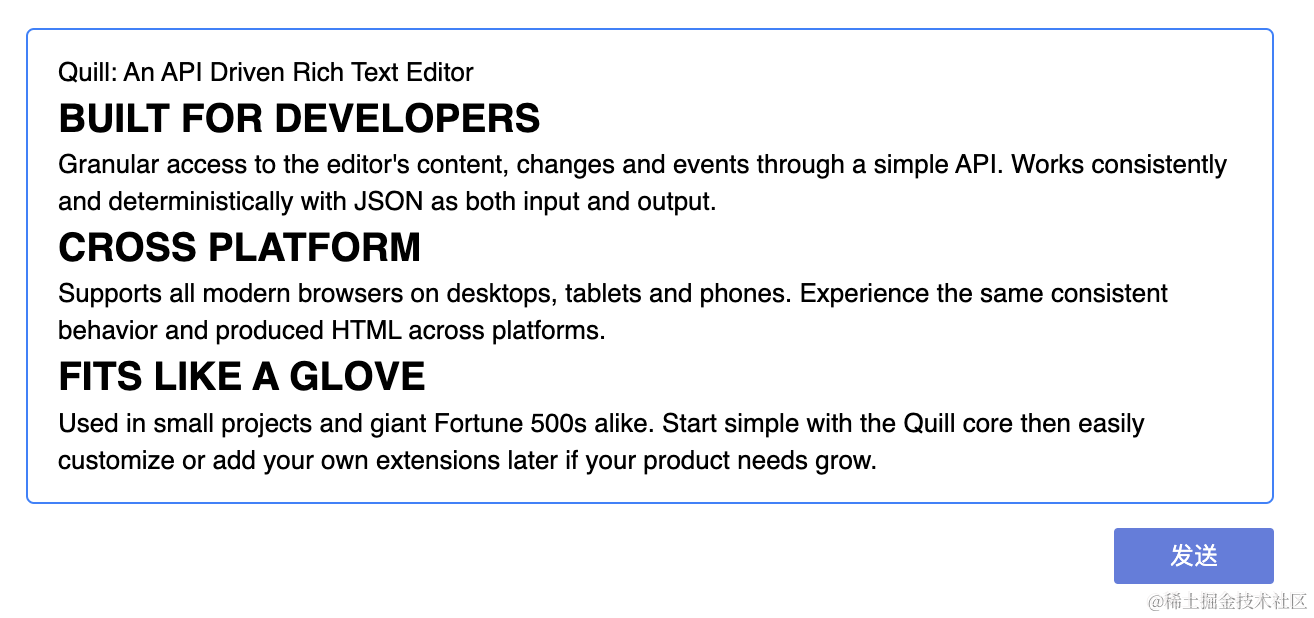
如果容器里面已经有一些 HTML 元素,那么初始化 Quill 的时候,那些元素也会渲染出来,比如:
html
<div id="editor">
  <p>Quill: An API Driven Rich Text Editor</p>
  <h2>BUILT FOR DEVELOPERS</h2>
  <p>Granular access to the editor's content, changes and events through a simple API. Works consistently and deterministically with JSON as both input and output.</p>
  <h2>CROSS PLATFORM</h2>
  <p>Supports all modern browsers on desktops, tablets and phones. Experience the same consistent behavior and produced HTML across platforms.</p>
  <h2>FITS LIKE A GLOVE</h2>
  <p>Used in small projects and giant Fortune 500s alike. Start simple with the Quill core then easily customize or add your own extensions later if your product needs grow.</p>
</div>
渲染出来的编辑器效果:
2.2 配置选项 options
第二个参数是可选的配置选项options,options是一个JSON对象,比如我们想给我们的编辑器增加一个主题,使它不再那么单调。
ts
const quill = new Quill('#editor', {
  theme: 'snow'
});
另外需要引入该主题对应的样式:
css
@import 'quill/dist/quill.snow.css';这时我们看到编辑器已经有一个工具栏。
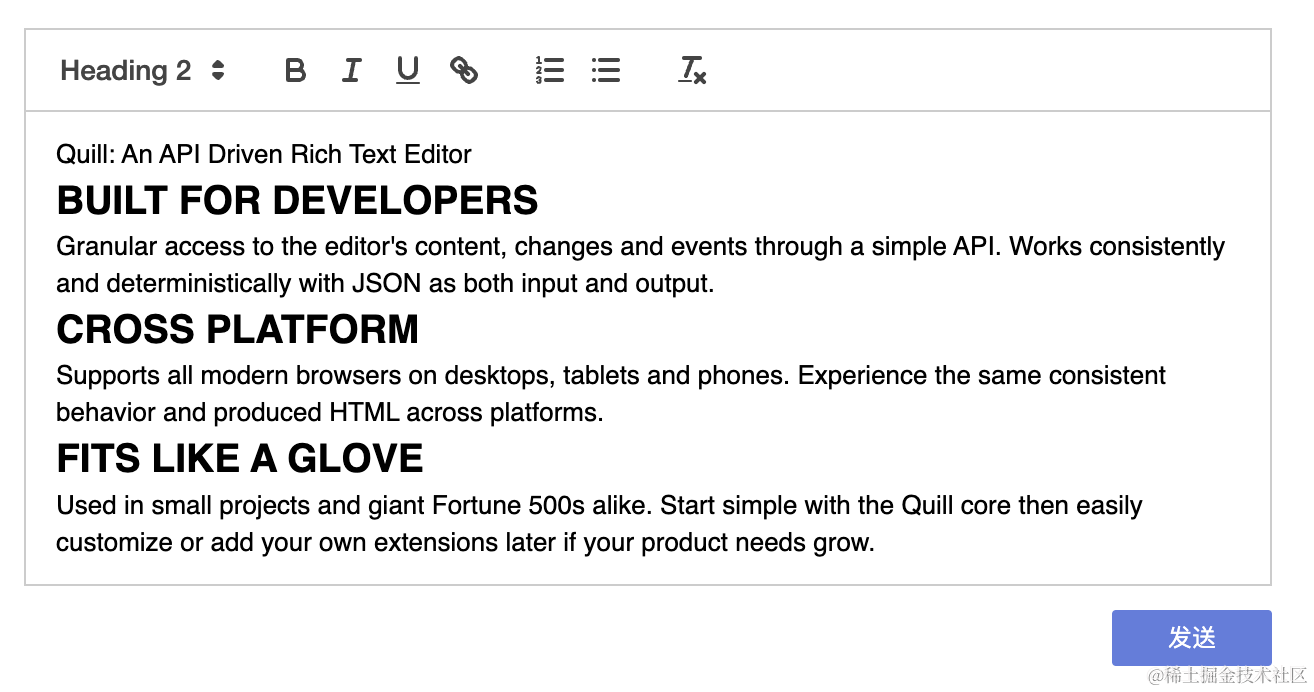
并且可以通过工具栏对编辑器的内容进行操作,比如给Quill增加一个超链接:
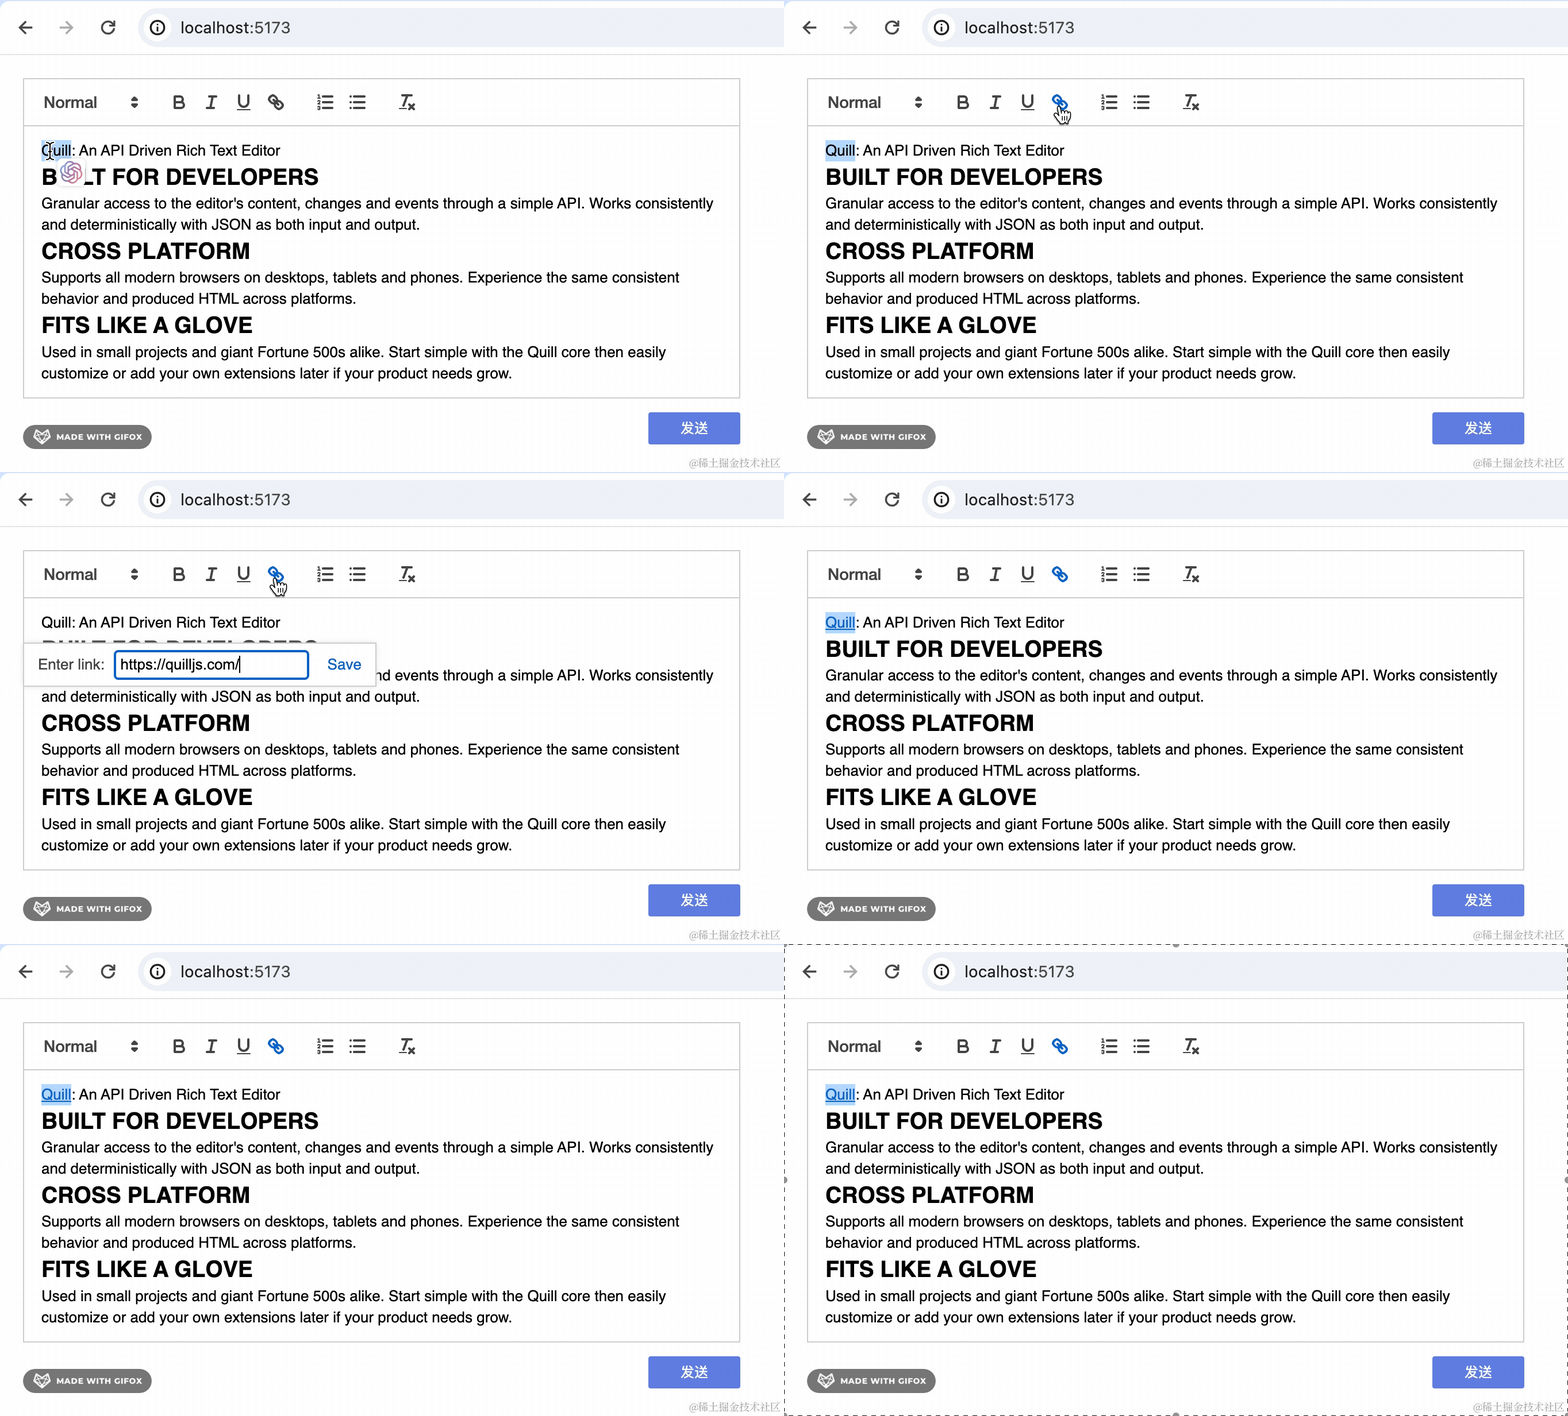
除了snow主题,Quill 还内置了一个bubble气泡主题,配置方式和snow主题一样:
- 引入主题样式
- 在options里配置主题
css
// 引入bubble主题样式
@import 'quill/dist/quill.bubble.css';
ts
const quill = new Quill('#editor', {
  theme: 'bubble' // 配置 bubble 主题
});
效果如下:
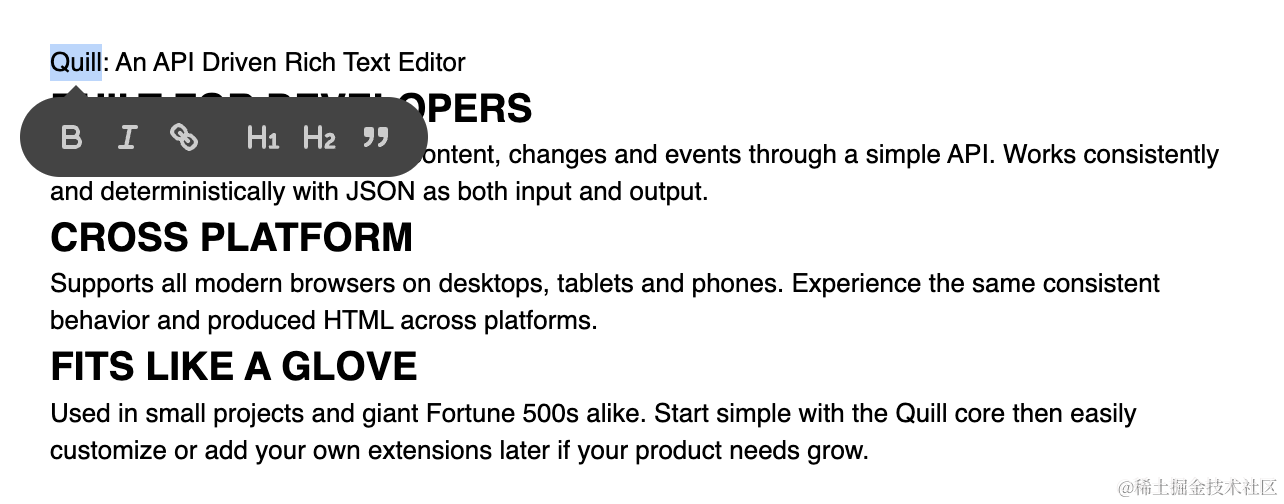
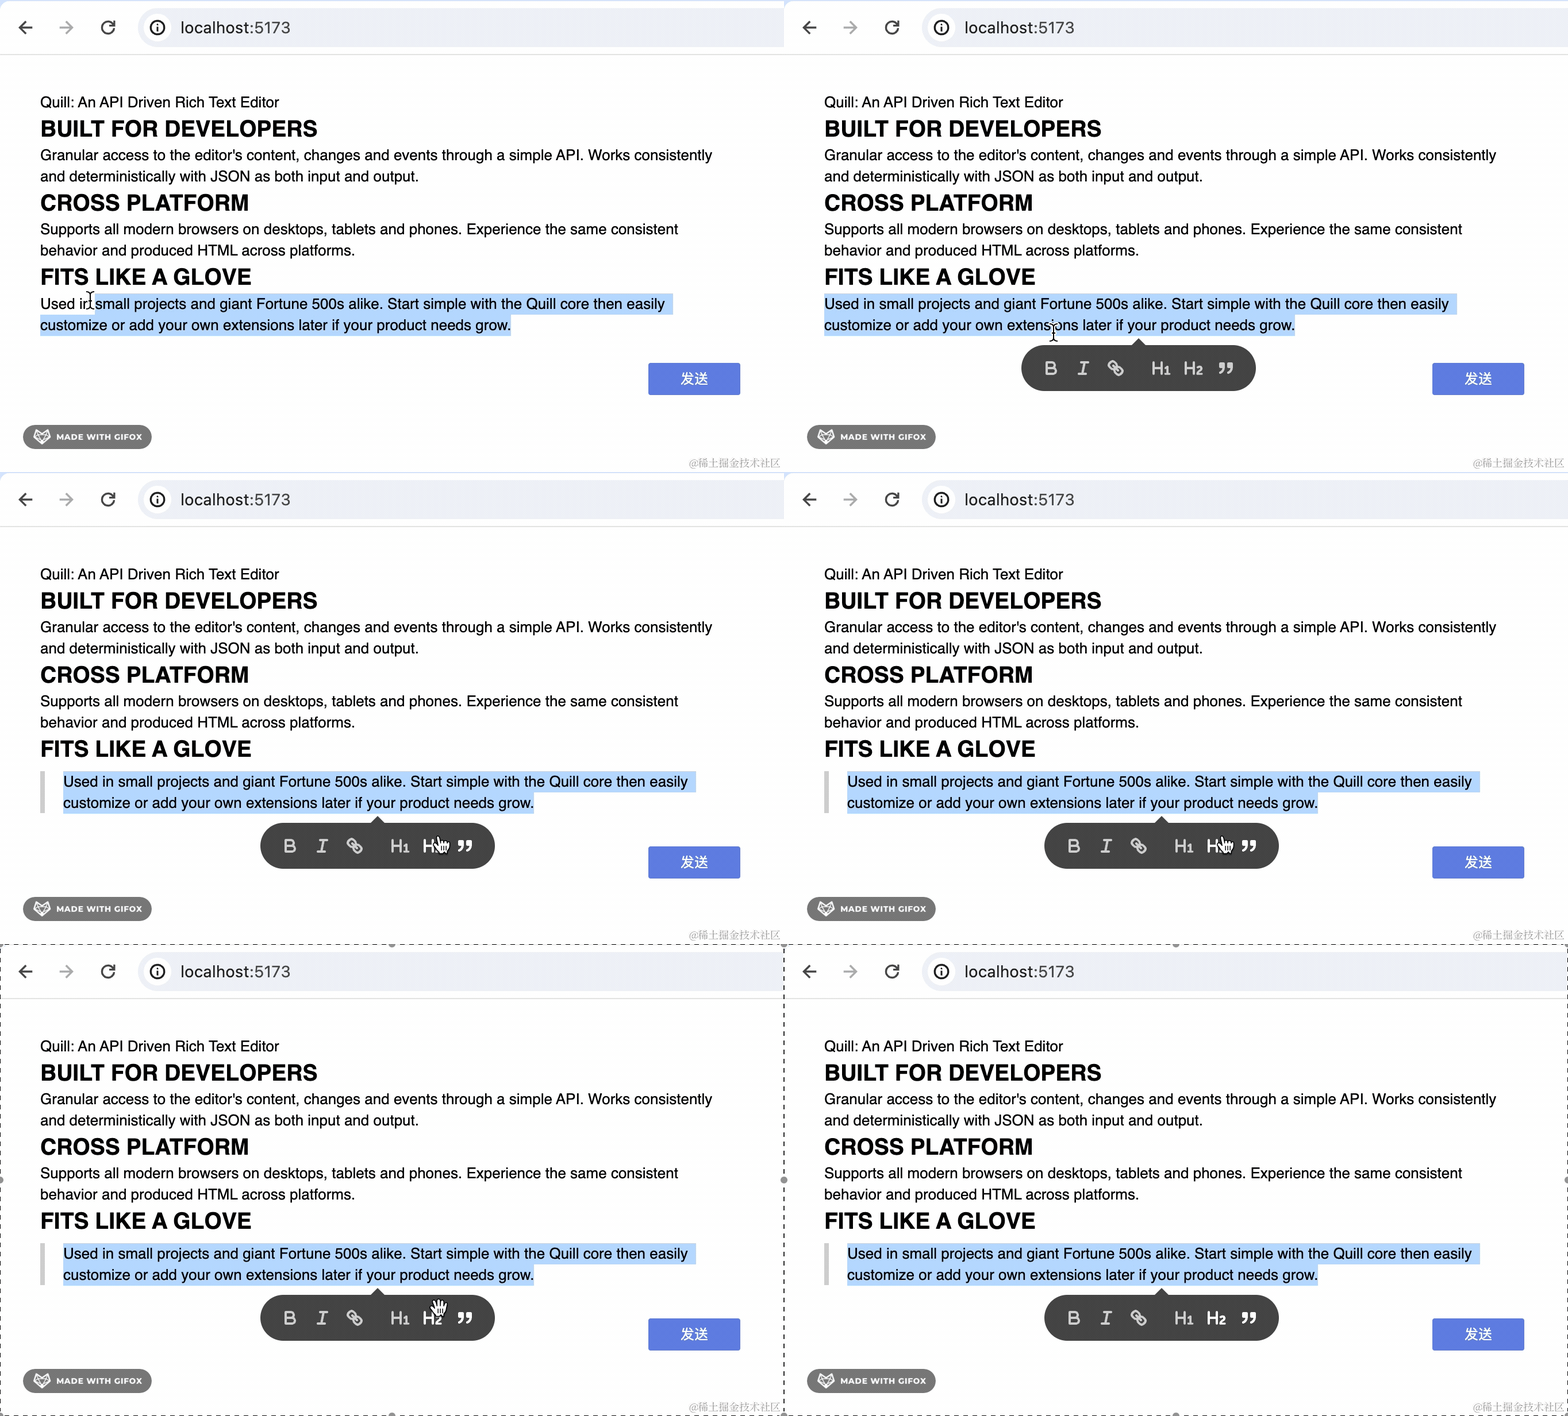
bubble主题没有显性的工具栏,它会在你选中编辑器中的文本时,在选中文本的下方显示一个气泡工具栏,从而对文本进行格式化操作,比如给选中的段落增加引用格式:
3 更多配置选项
Quill 不仅仅可以配置主题,options一共支持8个配置选项:
- bounds 编辑器内浮框的边界
- debug debug级别
- formats 格式白名单
- modules 模块
- placeholder 占位文本
- readOnly 只读模式
- scrollingContainer 滚动容器
- theme 主题
3.1 formats 格式白名单
这个配置项非常有用,比如刚刚提到的掘金评论框,我们发现评论框里只能插入纯文本,其他格式都不允许,即使时粘贴进来的格式化文本也会变成纯文本。
在 Quill 里很容易实现,只需要配置formats为空数组即可。
ts
const quill = new Quill('#editor', {
  theme: 'snow',
  formats: []
});注意这里的formats格式白名单,控制的是内容实际的格式,和设置格式的渠道无关,比如formats设置为空,那么无论是:
- 通过工具栏设置格式
- 还是通过快捷键(比如
Ctrl+B)设置格式 - 亦或是粘贴带格式的文本
都是无法设置格式的。
如果我们想保留一部分格式,比如只保留粗体和列表两种格式:
ts
const quill = new Quill('#editor', {
  theme: 'snow',
  formats: [ 'bold', 'list' ]
});
Quill 一共支持11种行内格式:
- background
- bold
- color
- font
- code
- italic
- link
- size
- strike
- script
- underline
7种块级格式:
- blockquote
- header
- indent
- list
- align
- direction
- code-block
3种嵌入格式:
- formula
- image
- video
不配置formats选项,会默认支持所有的21种格式。
3.2 placeholder 占位文本
我们发现掘金的评论框在没有输入内容时,会有一个平等表达,友善交流的占位文本。

这可以很容易地通过配置placeholder选项实现。
ts
const quill = new Quill('#editor', {
  formats: [],
  placeholder: '平等表达,友善交流',
});
3.3 readOnly 只读模式
通过配置readOnly可以实现:
初始状态编辑器是阅读态,不可以编辑,可以通过点击
编辑按钮让编辑器变成编辑态。
3.4 modules 模块配置
这个配置项放在最后并不代表它不重要,恰恰相反,这是 Quill 中最重量级也是最常用的配置。
Quill 一共有6个内置模块:
- Clipboard 粘贴版
- History 操作历史
- Keyboard 键盘事件
- Syntax 语法高亮
- Toolbar 工具栏
- Uploader 文件上传
每个模块的用途详见Quill内置模块章节。
modules选项可以用来配置这些模块。
在后面原理篇的文章中,我也会给大家详细介绍 Quill 模块的工作原理,敬请期待!
3.4.1 配置 toolbar 模块
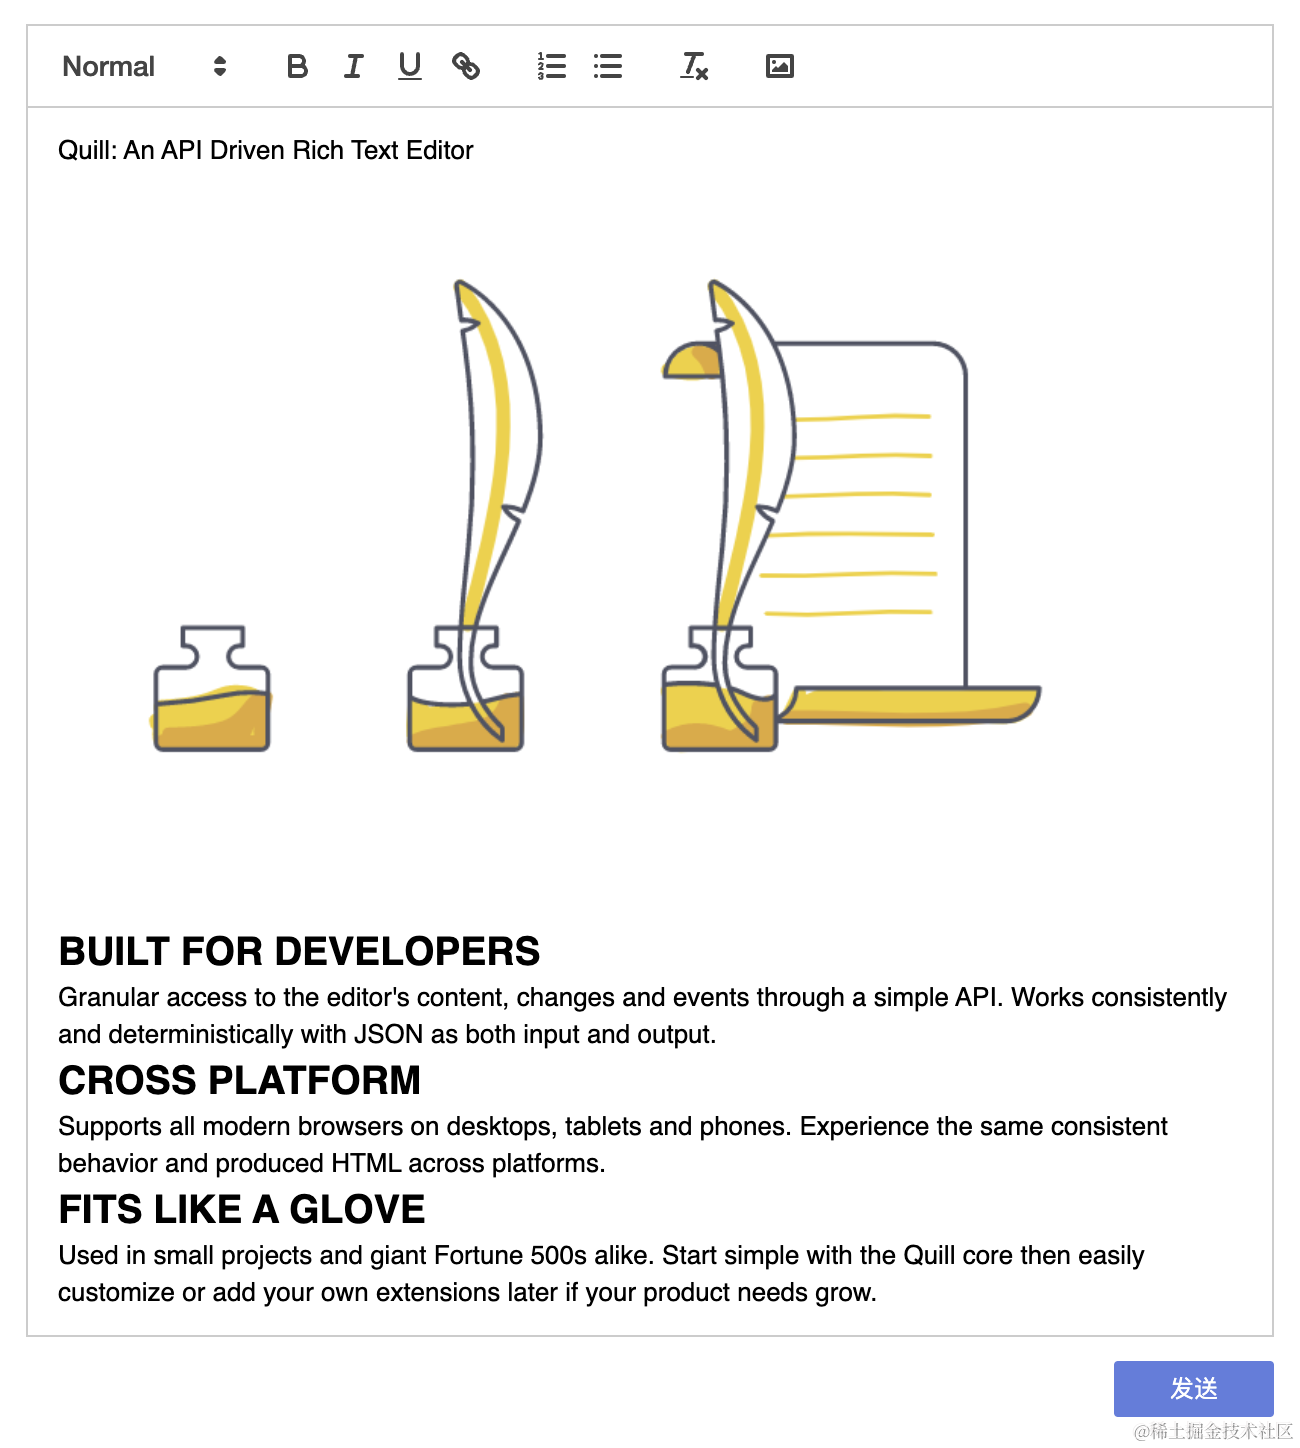
Quill 默认只在工具栏中显示一部分格式化按钮,里面没有插入图片的按钮,我们可以通过配置toolbar模块来增加。
ts
const quill = new Quill('#editor', {
  theme: 'snow',
  modules: {
    toolbar: [
      // 默认的
      [{ header: [1, 2, 3, false] }],
      ['bold', 'italic', 'underline', 'link'],
      [{ list: 'ordered'}, { list: 'bullet' }],
      ['clean'],

       // 新增的
      ['image']
    ]
  }
});
如果想做一个掘金这样的编辑器,也非常简单。
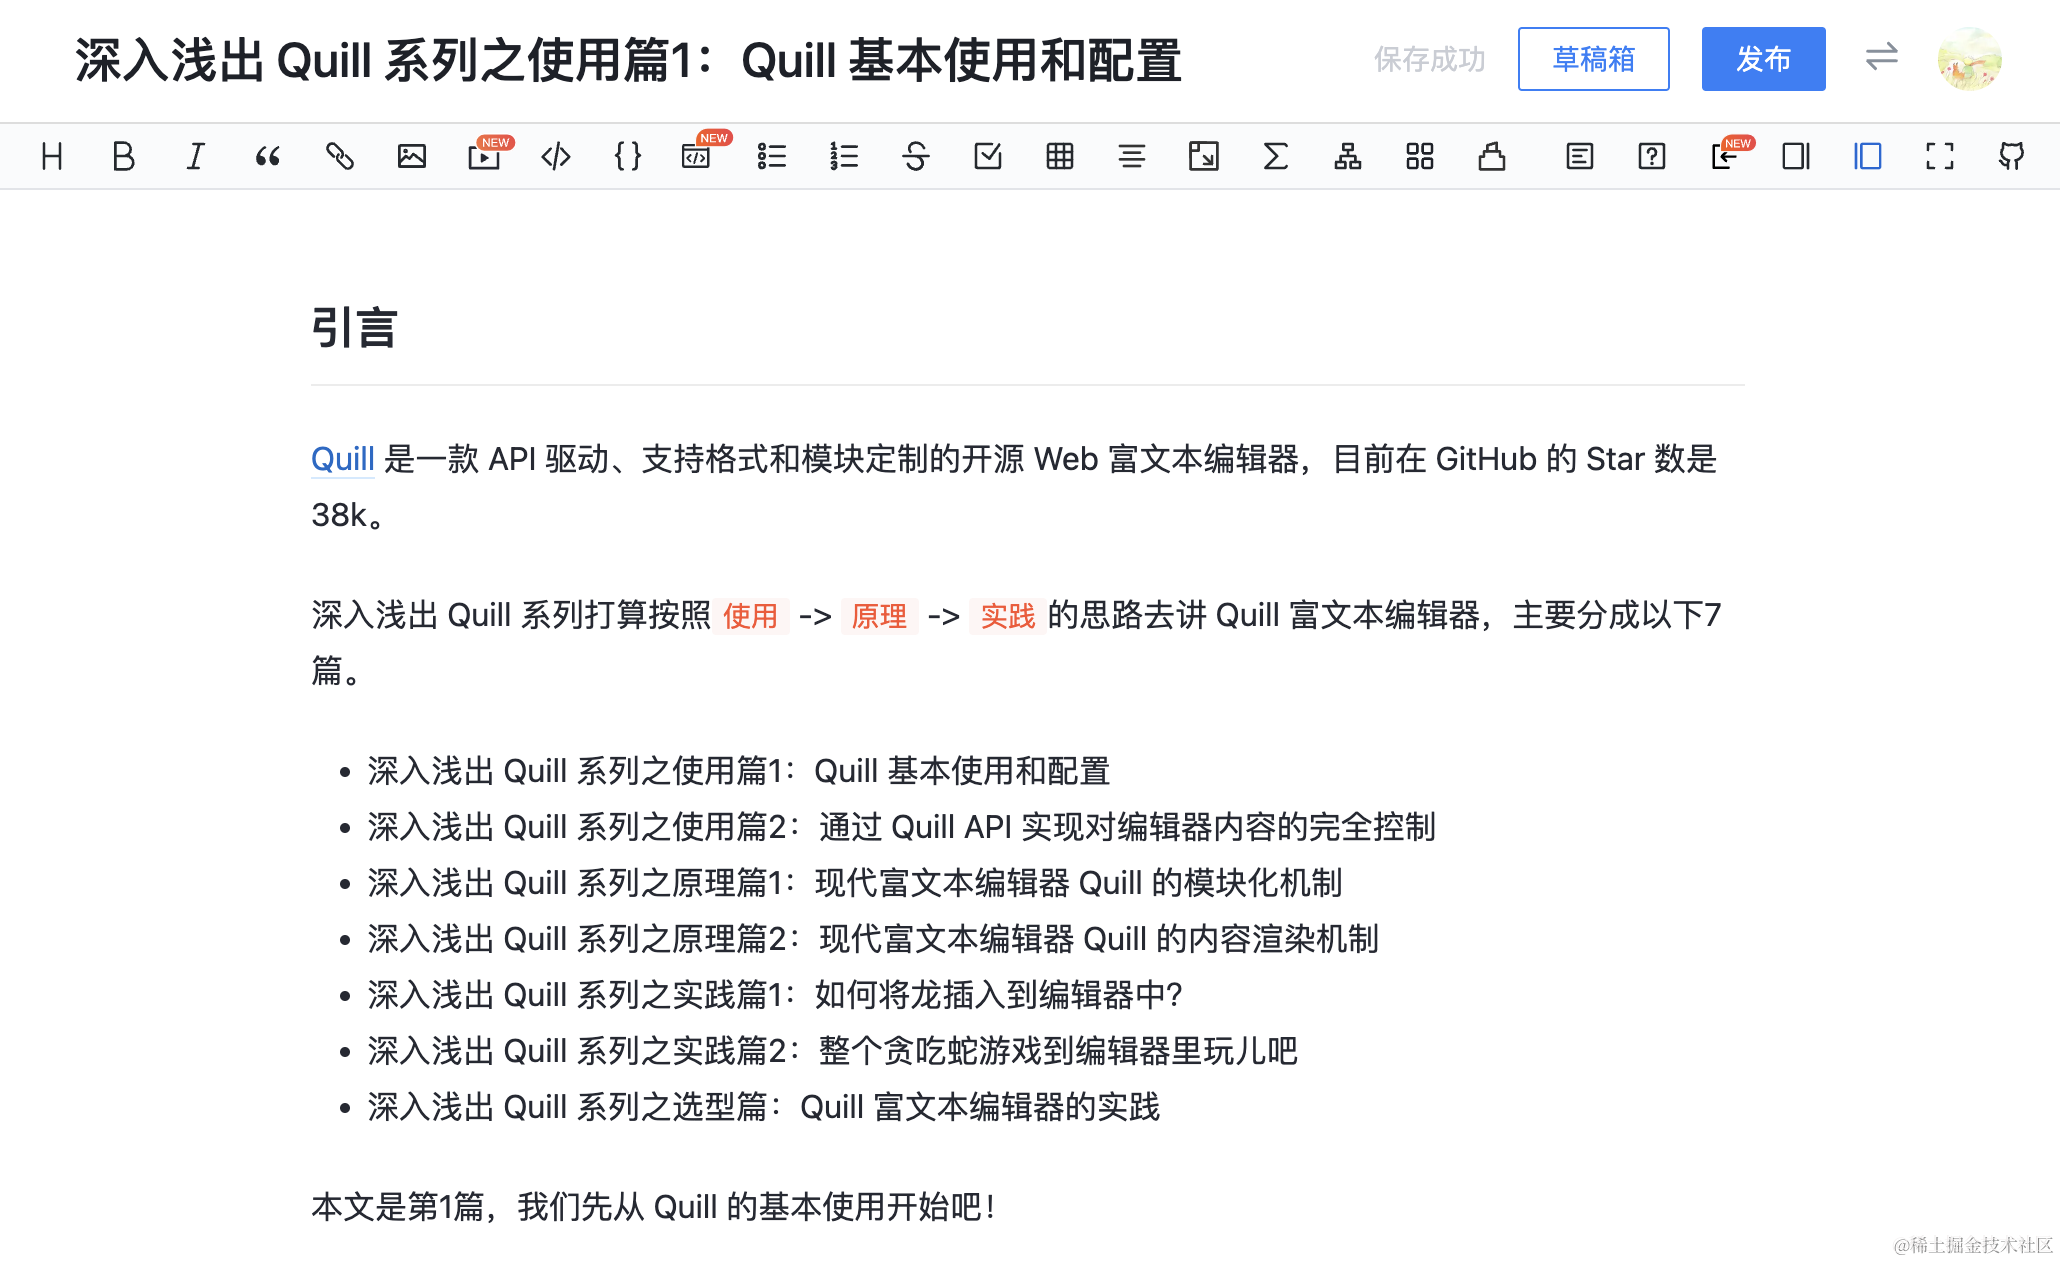
掘金的富文本编辑器主要包含以下工具栏按钮:
- 标题
- 加粗
- 斜体
- 引用
- 超链接
- 插入图片
- 插入视频
- 行内代码
- 代码块
- 无序列表
- 有序列表
- 删除线
- 对齐方式
- 公式
有些掘金编辑器的功能,Quill 是没有的,所以没展示出来。
使用 Quill 实现,需要这样配置toolbar模块。
ts
const quill = new Quill('#editor', {
  theme: 'snow',
  modules: {
    toolbar: [
      { header: [1, 2, 3, 4, 5, 6, false] }, // 标题
      'bold',             // 加粗
      'italic',           // 斜体
      'blockquote',       // 引用
      'link',             // 超链接
      'image',            // 插入图片
      'video',            // 插入视频
      'code',             // 行内代码
      'code-block',       // 代码块
      { list: 'bullet' }, // 无序列表
      { list: 'ordered'}, // 有序列表
      'strike',           // 删除线
      { 'align': [] },    // 对齐方式
      'formula'           // 公式
    ]
  }
});
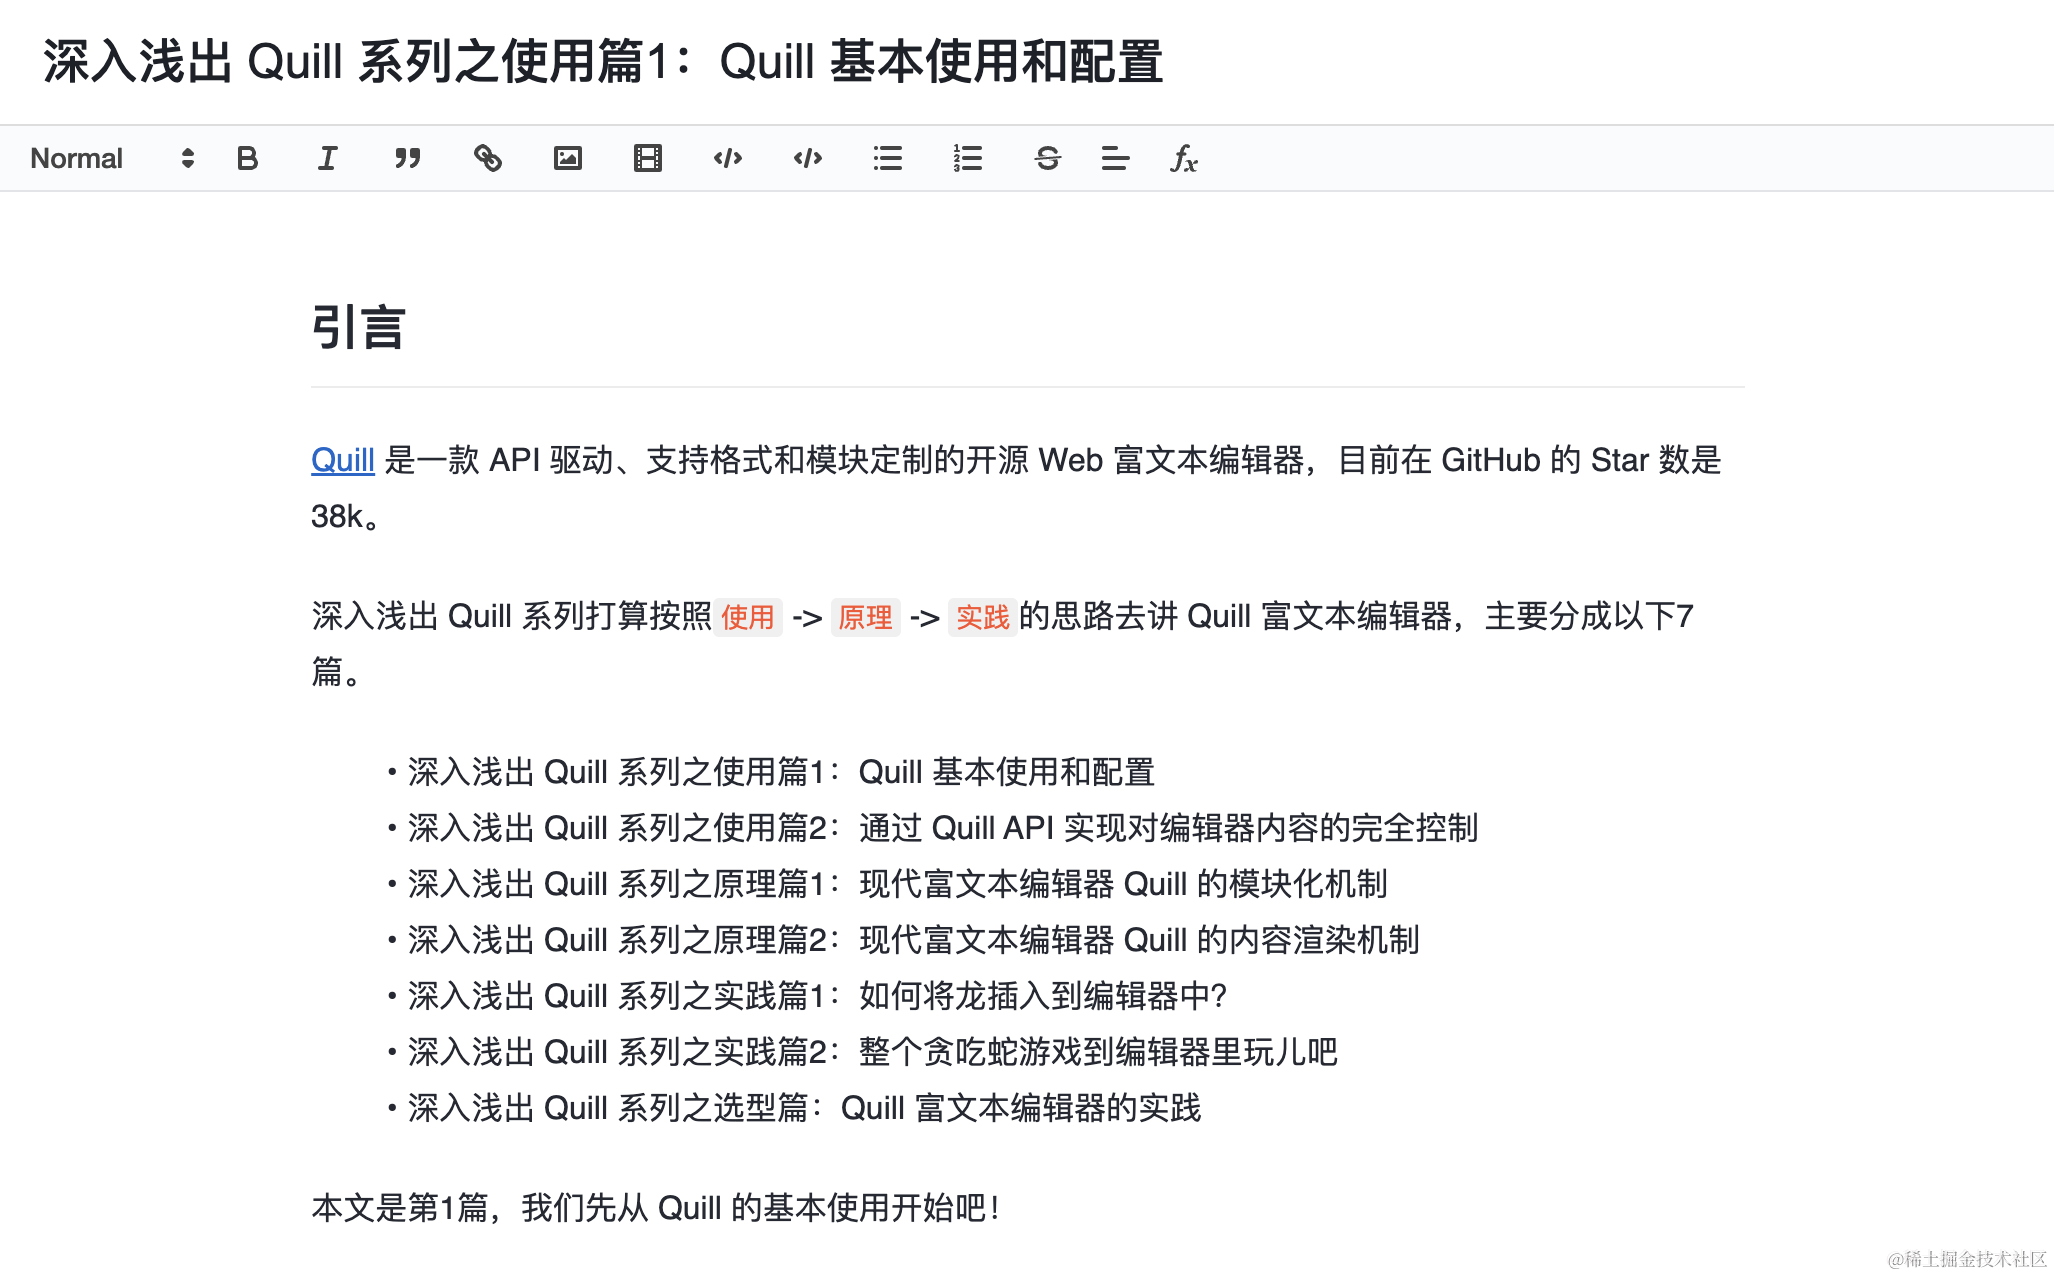
稍微修改下样式,就能做出一个和掘金富文本编辑器差不多的富文本编辑器啦,效果如下:
以下是和掘金实际的富文本编辑器的对比图:
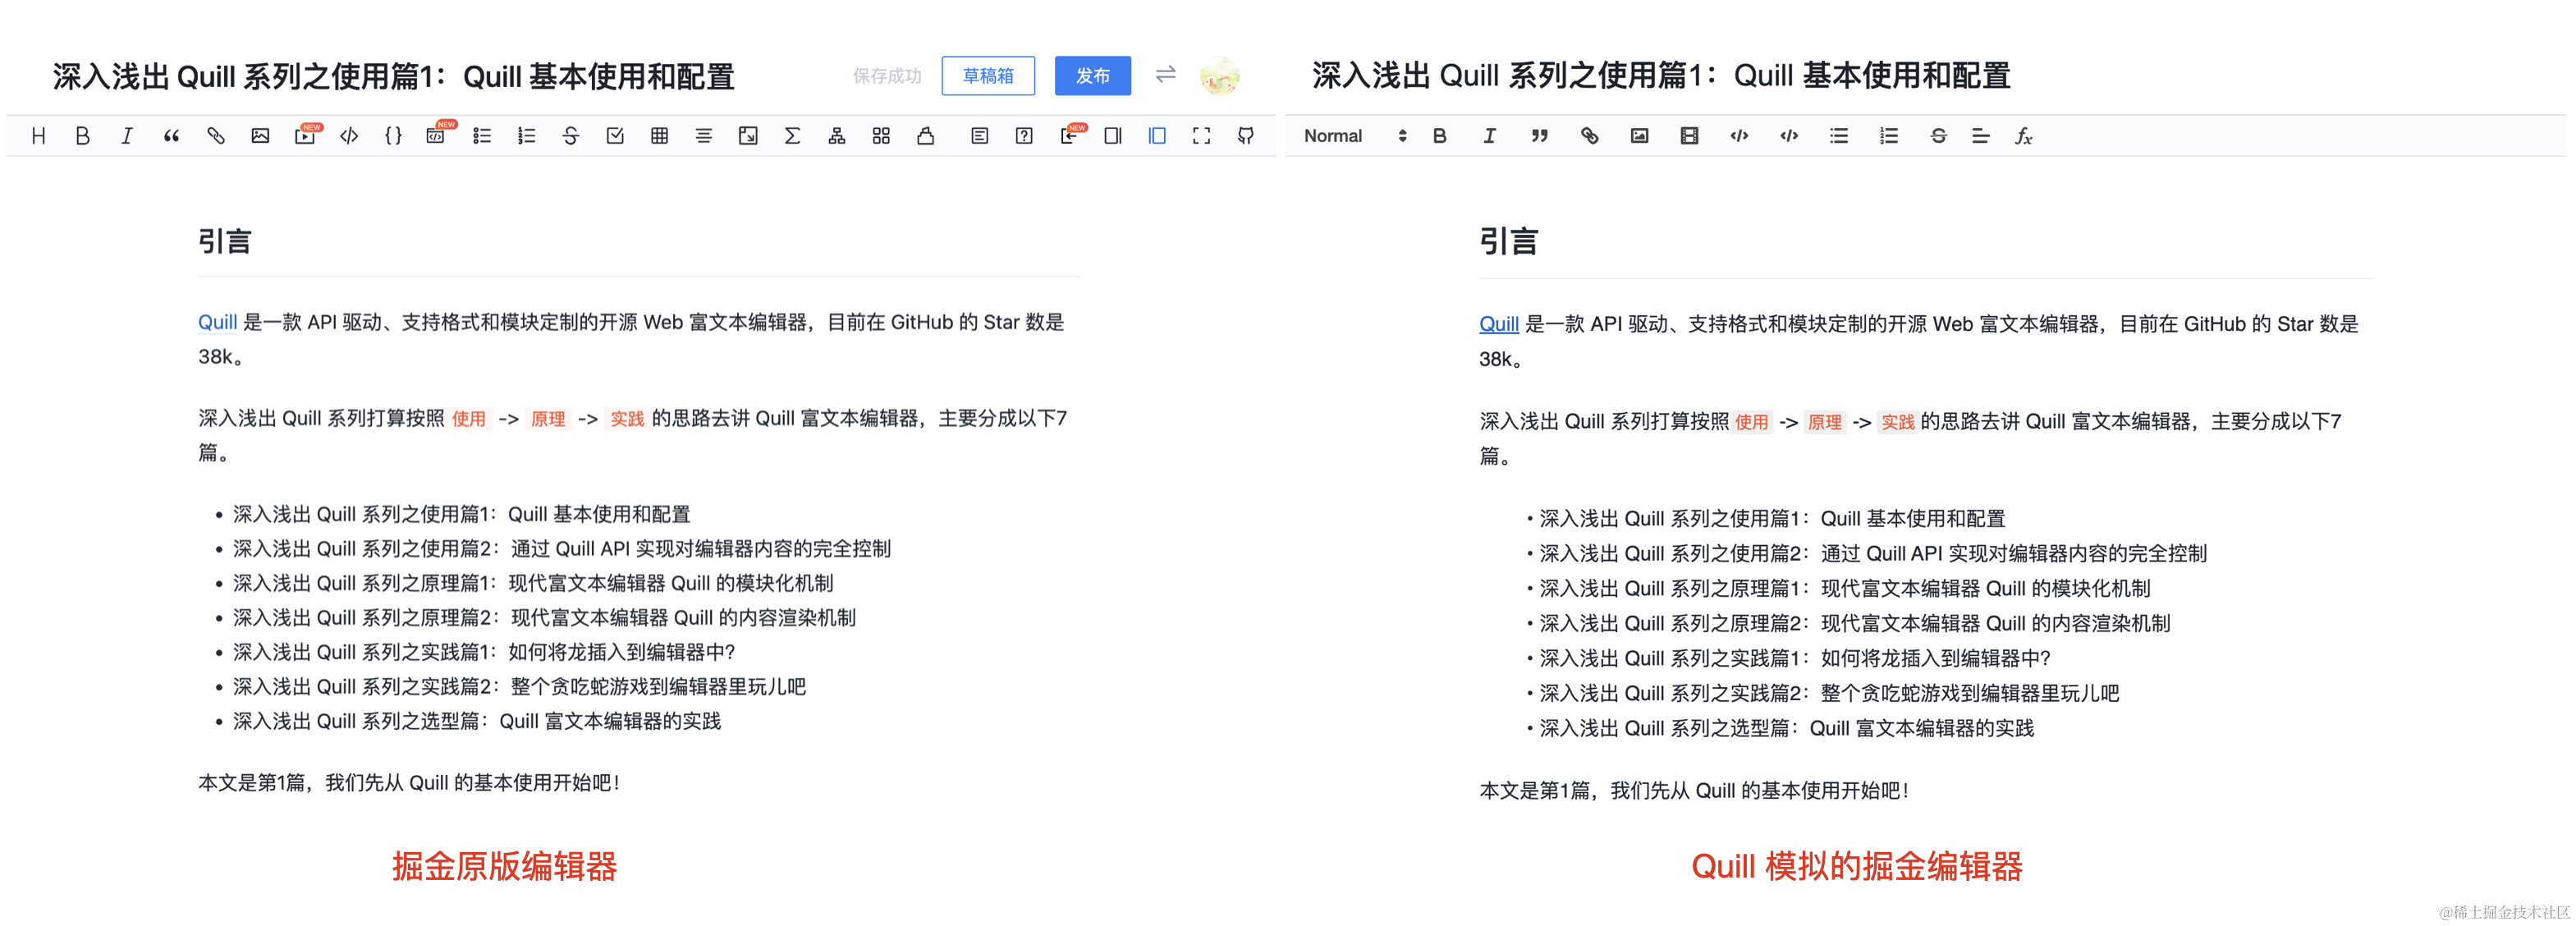
对比以上效果对比图,除了工具栏的 icon 有差异之外,其他几乎是一样的。
3.4.2 配置 keyboard 模块
除了工具栏模块,我们还可以配置别的模块,比如快捷键模块keyboard,keyboard模块默认支持很多快捷键,比如:
- 加粗的快捷键是
Ctrl+B; - 超链接的快捷键是
Ctrl+K; - 撤销/回退的快捷键是
Ctrl+Z/Y。
但它不支持删除线的快捷键,如果我们想定制删除线的快捷键,假设是Ctrl+Shift+S,可以这样配置:
ts
const quill = new Quill('#editor', {
  theme: 'snow',
  modules: {
    toolbar: [
      // 默认的
      [{ header: [1, 2, 3, false] }],
      ['bold', 'italic', 'underline', 'link'],
      [{ list: 'ordered'}, { list: 'bullet' }],
      ['clean'],
      ['image']
    ],

    // 新增的
    keyboard: {
      bindings: {
        strike: {
          key: 'S',
          ctrlKey: true,
          shiftKey: true,
          handler: function(range, context) {
            // 获取当前光标所在文本的格式
            const format = this.quill.getFormat(range);
            // 增加/取消删除线
            this.quill.format('strike', !format.strike);
          }
        },
      }
    },
  }
});
3.4.3 配置 history 模块
Quill 内置的history模块,每隔1s会记录一次操作历史,并放入历史操作栈(最大100)中,便于撤销/回退操作。
如果我们不想记录得那么频繁,想2s记录一次,另外我们想增加操作栈的大小,最大记录200次操作历史,可以这样配置:
ts
const quill = new Quill('#editor', {
  theme: 'snow',
  modules: {
    toolbar: [
      // 默认的
      [{ header: [1, 2, 3, false] }],
      ['bold', 'italic', 'underline', 'link'],
      [{ list: 'ordered'}, { list: 'bullet' }],
      ['clean'],
      ['image']
    ],
    keyboard: {
      bindings: {
        strike: {
          key: 'S',
          ctrlKey: true,
          shiftKey: true,
          handler: function(range, context) {
            // 获取当前光标所在文本的格式
            const format = this.quill.getFormat(range);
            // 增加/取消删除线
            this.quill.format('strike', !format.strike);
          }
        },
      }
    },

    // 新增的
    history: {
      delay: 2000, // 2s记录一次操作历史
      maxStack: 200, // 最大记录200次操作历史
    }
  }
});
小结
本文主要介绍了 Quill 的基本用法,以及如何通过 options 选项配置 Quill,options 包含丰富的选项,可以快速配置出一个掘金文章编辑器。
Quill 是一个 API 驱动的富文本编辑器,下篇我将给大家介绍更加丰富的 Quill API,如何通过 Quill API 操纵编辑器内容。
发布时间: